About Build Your Imagination
Custom Game Systems
Battle Reports
Inquisitor Articles
The First Founding Project

Items For Sale


Commissioned Work
Dioramas
Army Origins
Completed Armies

30k Iron Warriors
30k Salamanders
30k Space Wolves
40k Black Legion
40k Blood Angels
40k Crimson Fist Bikers
40k Crimson Fists
40k Dark Eldar
40k Deathwatch
40k Grey Knights
40k Imperial Guard
40k Ork Warbikers
40k Ork Pirates
40k Plague Marines
40k Relictors
40k Adepta Sororitas
40k Sisters Of Battle
40k Space Wolves
40k Witch Hunters
40k World Eaters
40k World Eater Bikes
Age Of Sigmar Beastclaw
Age Of Sigmar Behemat
Age Of Sigmar Daughters
Age Of Sigmar Melusai
Age Of Sigmar Nighthaunt
Bloodbowl Teams
Bolt Action German Army
Dystopian Wars Britannia
Burrows + Badgers Warbands
Inquisitor Miniatures
Warhammer Underworlds
WHFB Dwarf Army
WHFB Empire Army
WHFB Goblin Army
WHFB Undead Army
WHFB Wood Elf Army
Oathmark Amazons
Oathmark Northmen

Chibi Combat Patrols
40k Chibi Guard
40k Chibi Necron
40k Chibi Sisters

Alhaus Black Templars Army
Alhaus Grey Knights Army
Alhaus Imperial Fist Army
Alhaus Stormcast Army
Darren's Nurgle Army
Dionzi's Ultramarines

Say No More Comic
Guild Wars Comic


Modelling: Paved Bases
Modelling: Water Bases
Sculpting: Laurels
Sculpting: Rivets
Sculpting: Skull Icons


Youtube Channel

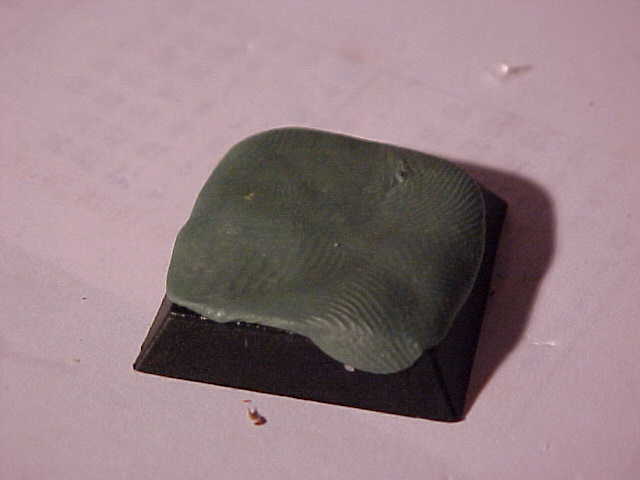
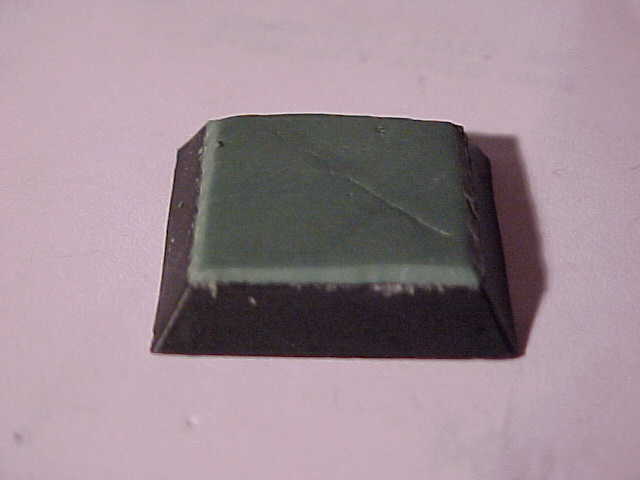
Modelling Technique: Paved Bases

For those who dont know, I've recently been getting into building walls in plaster for terrain and the game Confrontation by Rackham.

I have a growing undead force, and in an attempt to do the bases differently from all my other bases have been trying a paved effect to go with my walls...

This guide is designed for Square Bases, but I'm sure the techniques work on round bases (as I have done it!)

Firstly, clean up the base, file off tabs and so on.

Next up, I cover the entire base in Greenstuff. Style is of little importance, just make sure the entire top part of the base is covered.

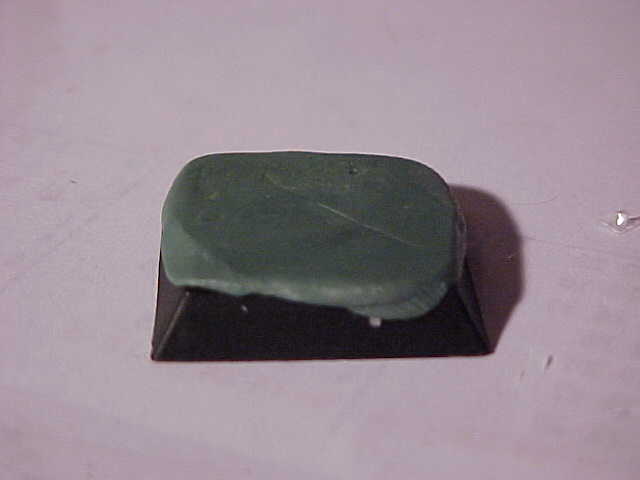
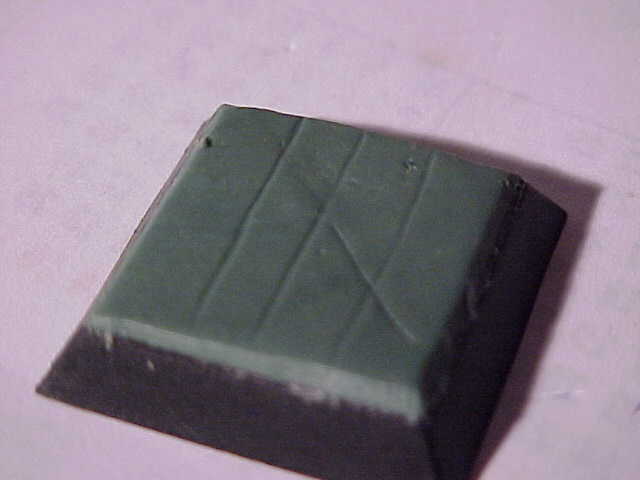
Once happy with coverage, I take a tile and wet it down. Different to normal techniques, the tile needs to be clean and wet (as opposed to moist).
I press the base upside down onto the wet patch. Turning it 45 degrees each way to ensure smoothness of the Greenstuff.
Carefully lifting of the base (shouldn't stick with the wetness of the tile), we end up with a smooth top surface free of fingerprints and the top will be flat (mine isn't, but thats the effect I'm going for!)

Next take a sharp, wet knife, and run it along the edges, keeping the blade flush with the base's angle.

Take a moist sculpting tool and carefully score gentle lines in the Greenstuff. These will be guidelines for the Brickwork, so decide how big the blocks will be and positioning and so on.

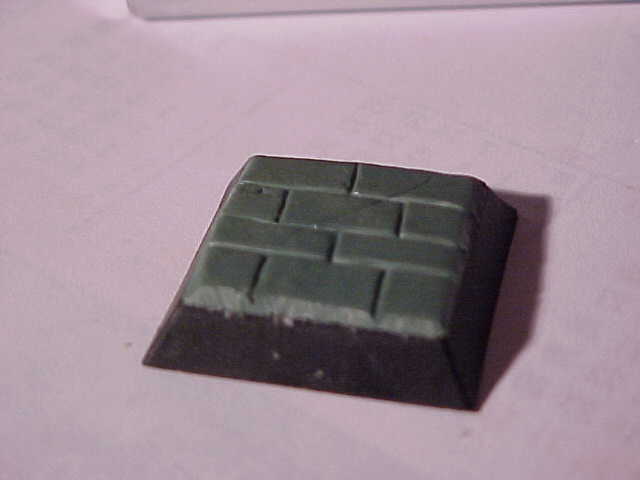
I then scored more guidelines in showing the brickwork. Notice how bricks are laid in real life with each row 50% further along? not always for paved floorings but the effect looks better than a grid.

Next up, moist sculpting tool is dragged along the guidelines with a little more pressure, scoring a groove.
Once the end of a line is reached, you may find small raised patches of Greenstuff. these are either flattened into the base edge or into the ajoining brickwork carefully.
Either way, it is important not to have any bitz inside the grooves.

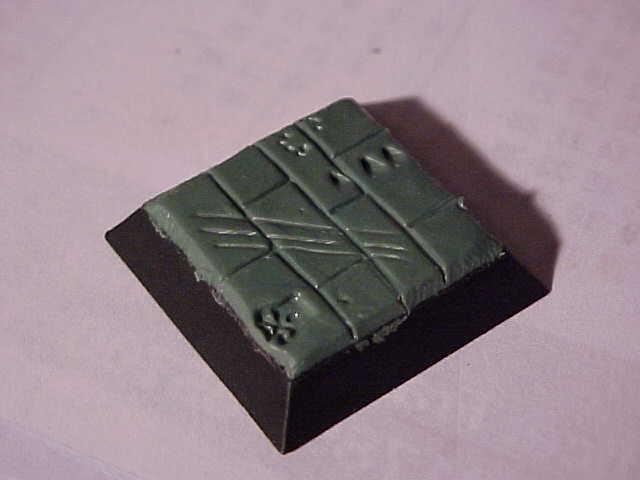
As I am going for a dark feeling to my undead, I carefully dragged a moist sculpting tool along for claw marks, pressed a wet skull into a brick for a mark and generally picked at the bricks for a wron effect.
photos of real cobble streets and paving slabs may help your inspiration. just remember to keep the grooves between bricks clear!

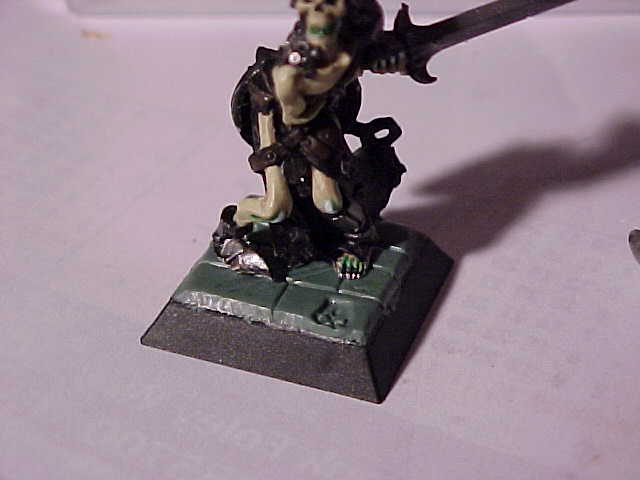
Once the greenstuff has been left overnight to dry properly, a pair of guide holes are drilled into the base and the figure pinned and glued in place, ready for undercoat!

Its a fair bit of work, but I find sculpting bricks one of the most relaxing techniques I have!
there is no reason why once dry, extra greenstuff put on certain bricks for an uneven effect, or shields / bones placed ontop or flock as moss and so on...

Back to Top

All Images, Written Content and Design Copyright the Individual and Collective Creators of Build Your Imagination.

© buildyourimagination.co.uk (2004-2020)

Site Images by Christian Williams